
Did you know you can track sales from organic pins on Pinterest? Well, you absolutely can and it’s super easy. All you need is a Pinterest business account.
You might not know this about me but my other job is being a Pinterest ads manager. I’ve tracked thousands of sales through Pinterest advertising and it’s super easy to set up tracking.
Last year, Pinterest rolled out the conversion insights dashboard which gives you your number of sales from promoted and organic pins.
Pinterest tracking is available inside your Ads Manager. And did you know that you do not need to be running paid ads in order to set up your tags?
In fact, if you plan on running Pinterest ads in the future, setting up your tracking now will allow you to track your website visitors so you can target them when running promoted pins. Or use them when building actalike audiences.
Ready, okay let’s start with step #1.
Step #1 // Finding your Pinterest Tag
First, log in to your Pinterest business account.
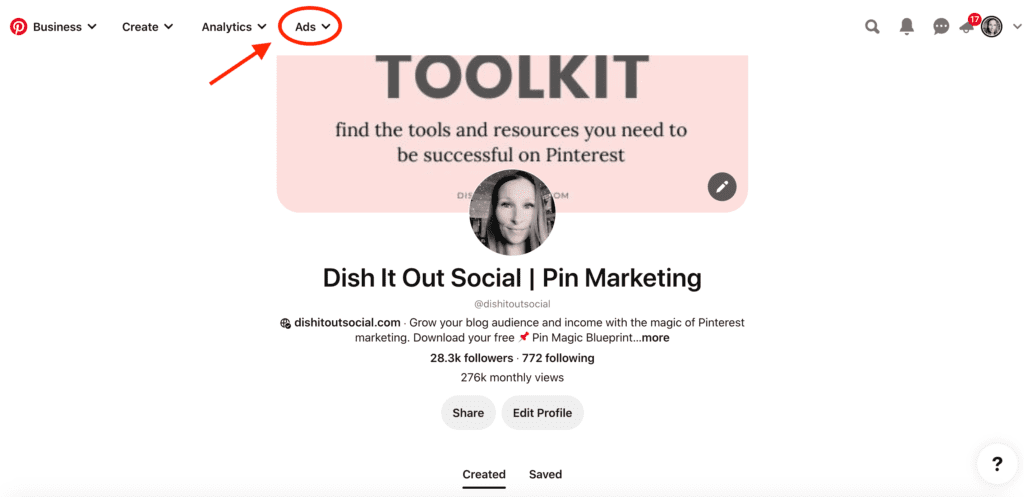
>> Go to your account home page and select “ADS” from the menu in the top left. (see image below)
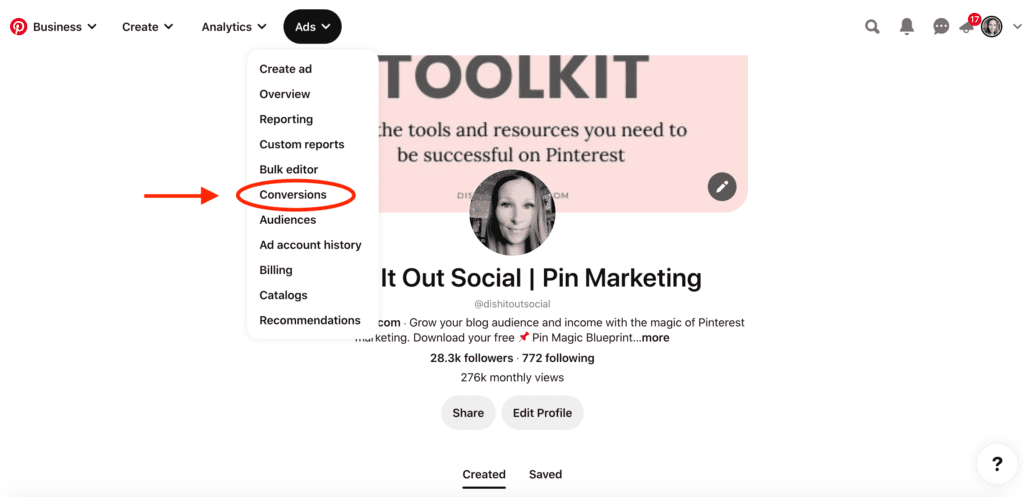
>> Click “CONVERSIONS” from the menu.
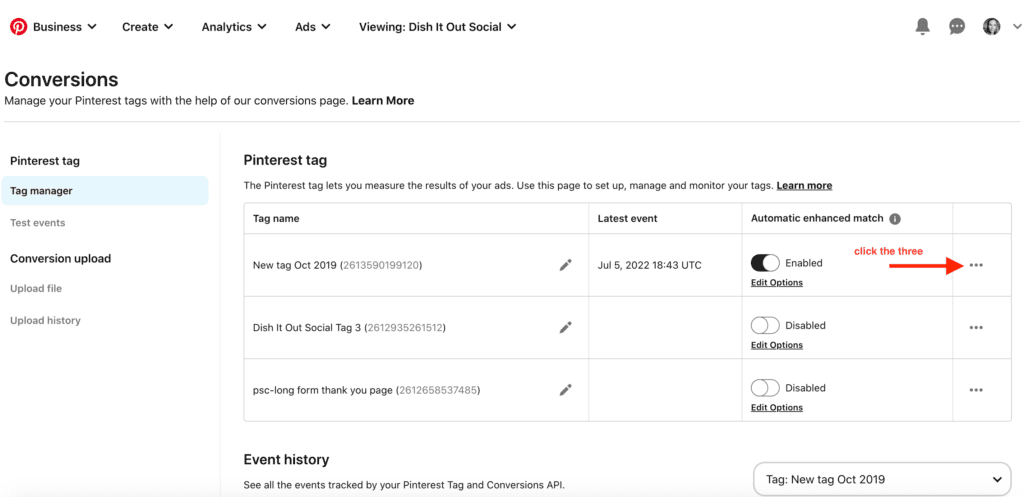
>> This is the page you should see (below). Click on those 3 dots to the right of your tag name.
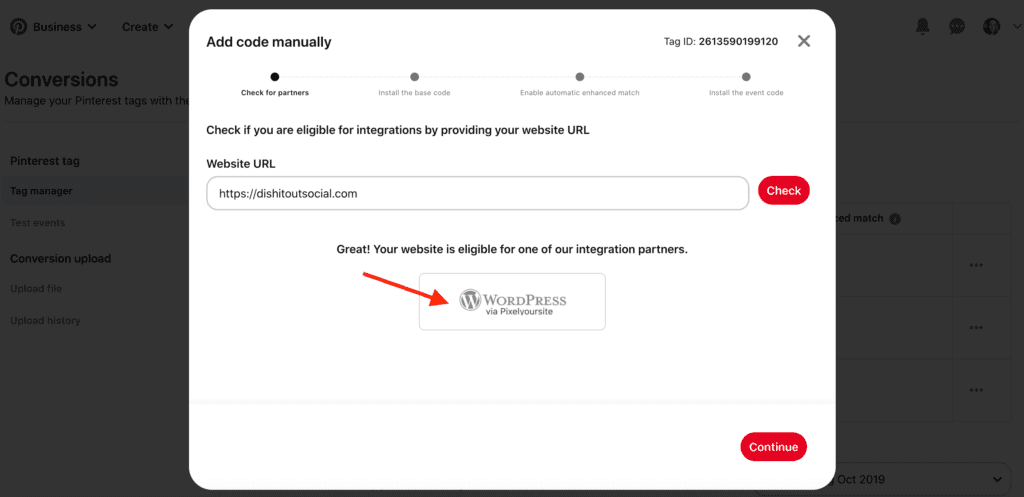
>> You will come to this screen. Pinterest can check to see if there are any integrations for your website. I use WordPress and the plugin PixelYourSite is the best and easiest plugin to use.
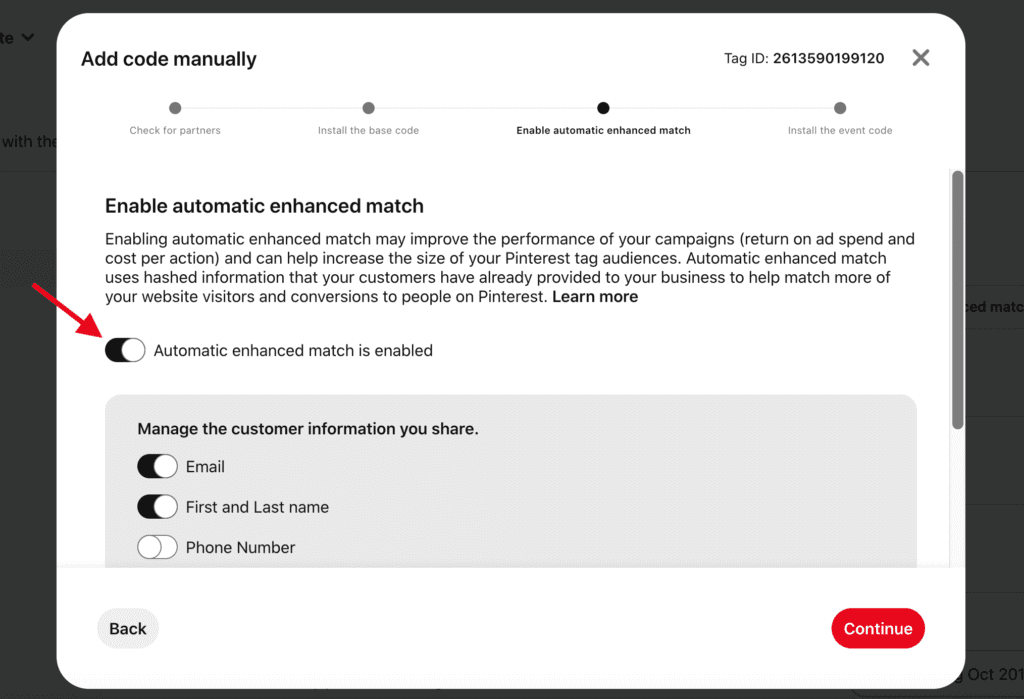
>> If you didn’t find any eligible integrations for your site, you’ll need to enter the code manually. You’ll see this page (below) that will ask you to turn on automatic enhanced match. I would turn it on and select the information you share.
Step #2 // Installing your Pinterest Tag
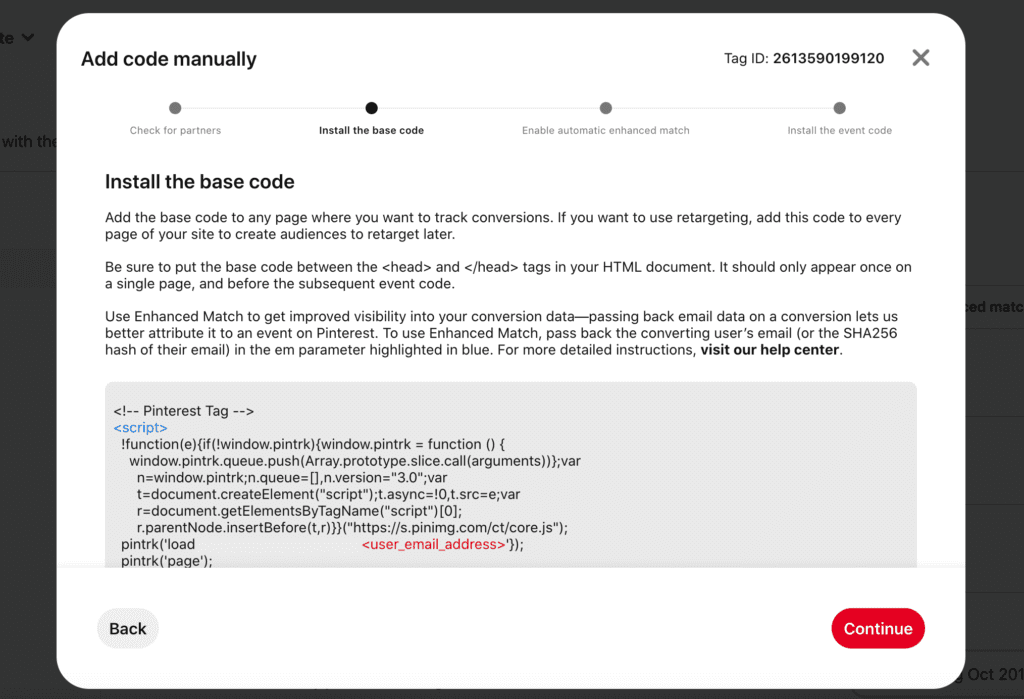
>> Next, you’ll select continue and you’ll be able to see your BASE CODE. Click on COPY and place this code into the <header> tag of the page you want to track. Or you can install it site-wide and get that base tag on every page of your website.
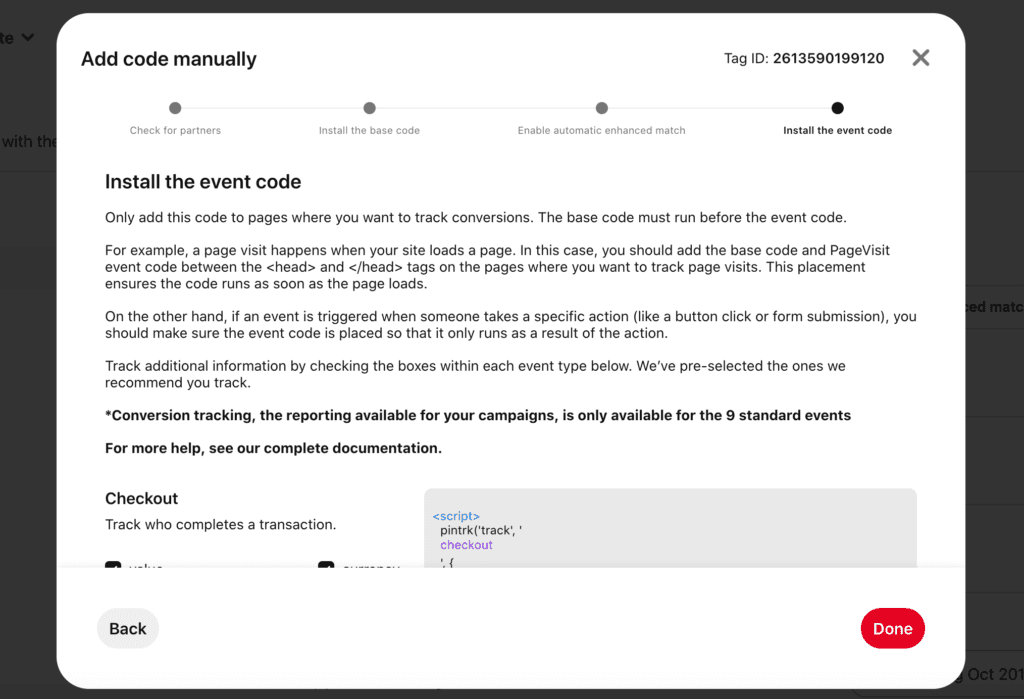
>> Just having the base code won’t allow you to track sales. For this, you need to add the CHECKOUT tag to your paid product thank you/confirmation page. Add this tag AFTER the base code inside your <header> tags.
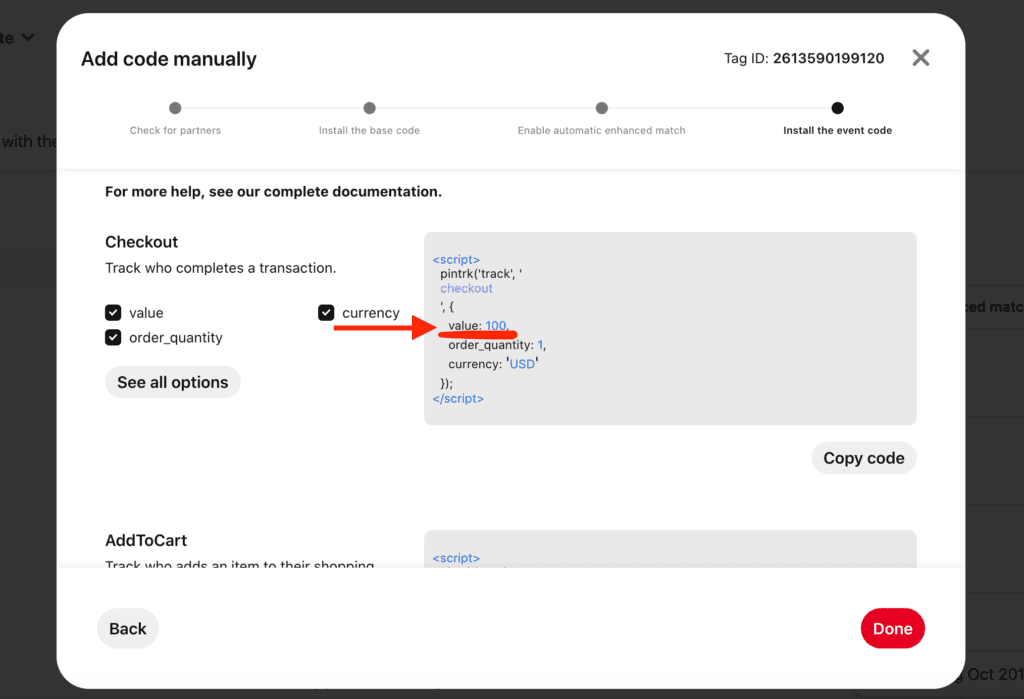
>> Make sure you change the DOLLAR VALUE of your tag on each product you track. The default is $100 so make sure you change it to the price of the product you’re tracking so you get an accurate number.
Step #3 // Make sure your tag is working
Once you have these tags installed, you’ll need to test them to make sure they are tracking. Pinterest has a test event that will test your tags and report back.
>> Go back to ADS > CONVERSIONS and then > TEST EVENTS. Enter the URL for your thank you/confirmation page (where you placed the tag) and come back to see what Pinterest has recorded.
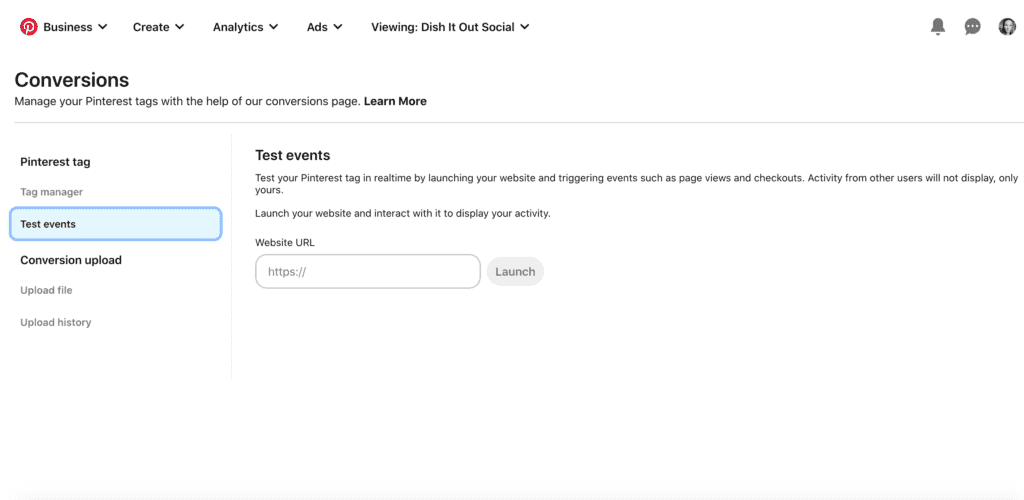
>> If the tag has fired it should look like this… you’ll see the “initialized tag” that is your base code. Then you’ll see whatever “event code” you place on that page. For the example below, you’ll see the signup tag.
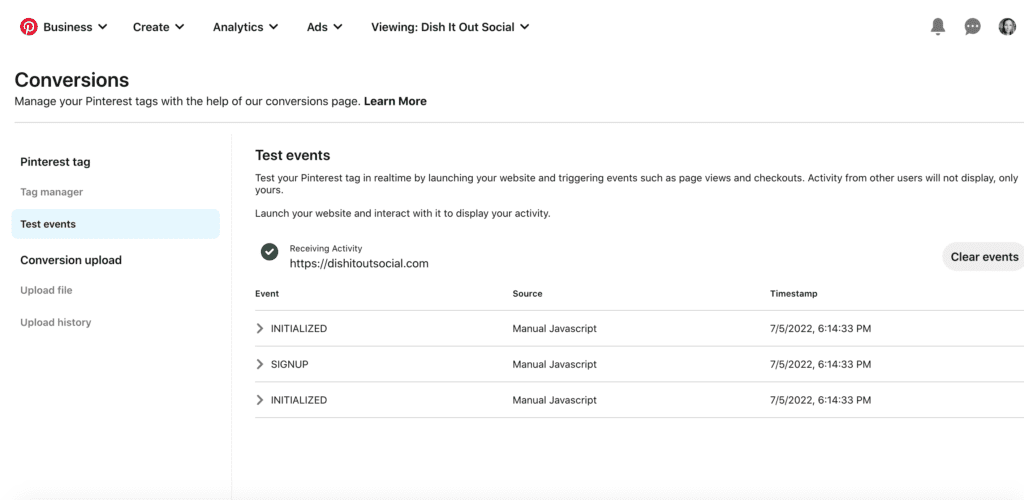
That’s it, you successfully installed your Pinterest tracking! Woohoo! Now, you’re probably wondering where you can look to see if you got any sales from Pinterest.
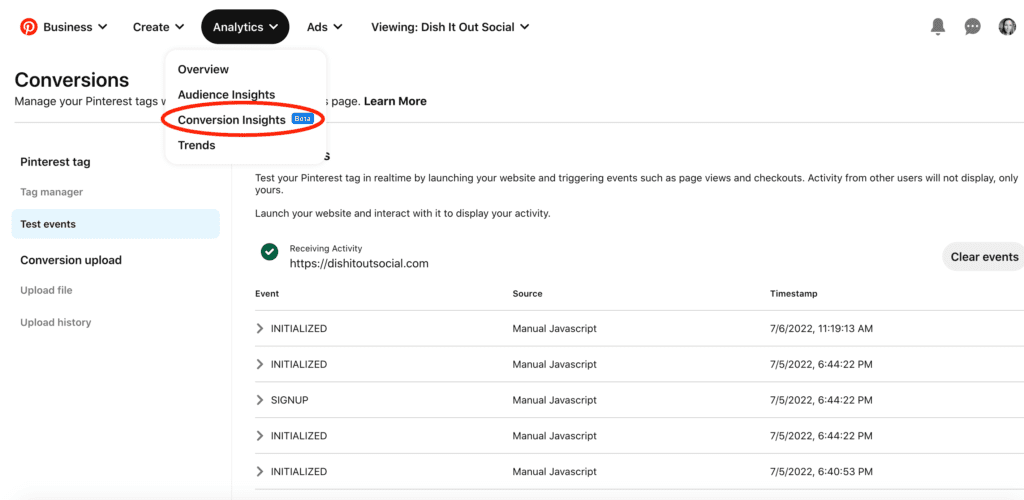
>> Go to the ANALYTICS tab and click CONVERSION INSIGHTS. (see below) Note: at the time of writing this post, conversion insights is still in BETA so you might not have access to it yet.
>> You’ll come to this page (below) where you’ll be able to see all your data. Choose your variables like date range, conversion window, and audience. You should be able to see which pins contributed to your sales but don’t be surprised if you can see this data (it’s a little glitchy right now due to it still being in BETA)
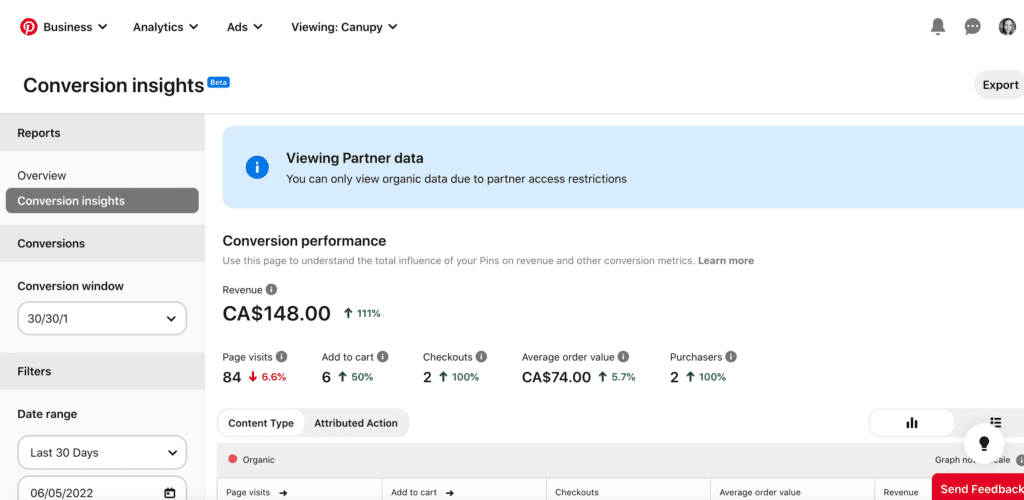
That’s all you have to do to start seeing how your efforts on Pinterest are contributing to your business revenue! All that hard work you put into Pinterest will help you make more sales and now you can actually see how much.
